Meet shaders (part 2) – Water from the rock. Blending with background.
Hi everybody. I was burnout so I had to stop working for a week. I hope You care of yourself and do not overwhelm you health with game developing.
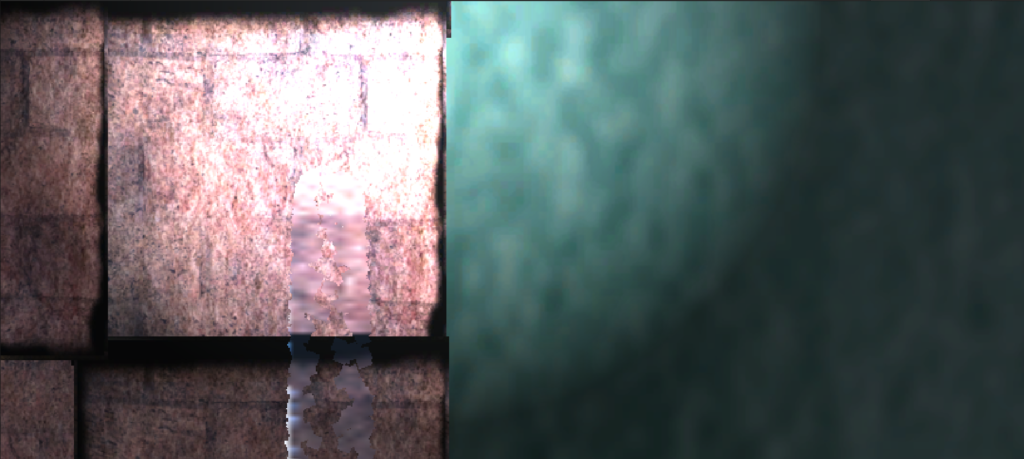
Today I want to show You water effect using particle system and renering to texture. This is a finall effect:
I have used Universal Render Pipeline. Requirements and Installations You can find in previous post: Meet shaders (part 1) – Luna The shadow dust effect – Crashed Creativity Studio
- First i have added a second camera to the scene and set its rendering to texture.
- Second i have created new Unlit Sprite Shader graph. Its good to use unlit shaders for particle systems. It increase performance.
- I dragged a texture created in (1) to shader graph. Next I have created graph below:
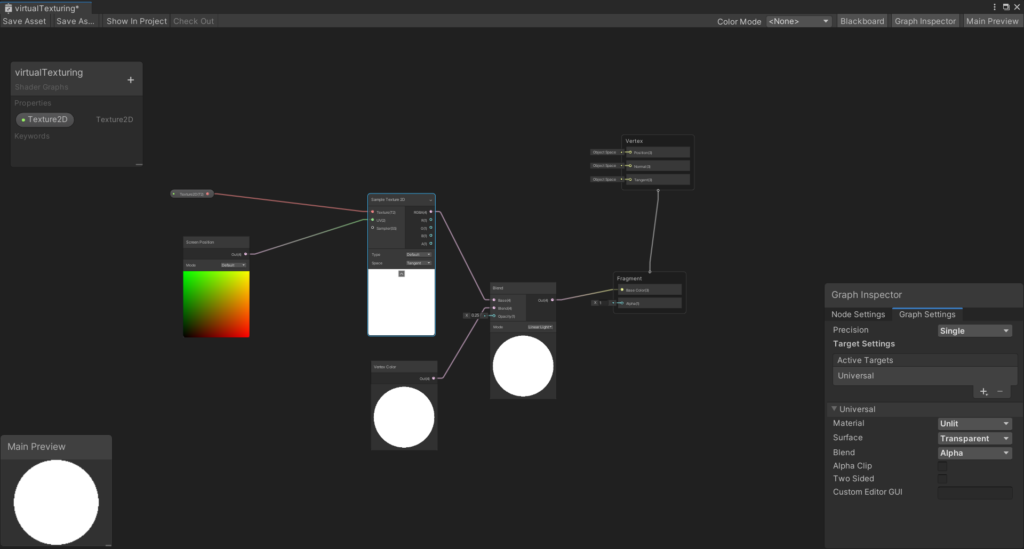
Camera’s texture is connected to Sample Texture Node, position of sample is taken from Sreen Positon Node. Output from Sample Texture is connected to Blend Node. This node blends background with Vrtex Color Node (Taken from particle color set in particle system) I have used blending Mode Linear light with Opacity 0.25. I have noticed that for small opacity i have noticed different look of game rendering comparing to editor view.
Next step is create a new material and assigng shader with just created.
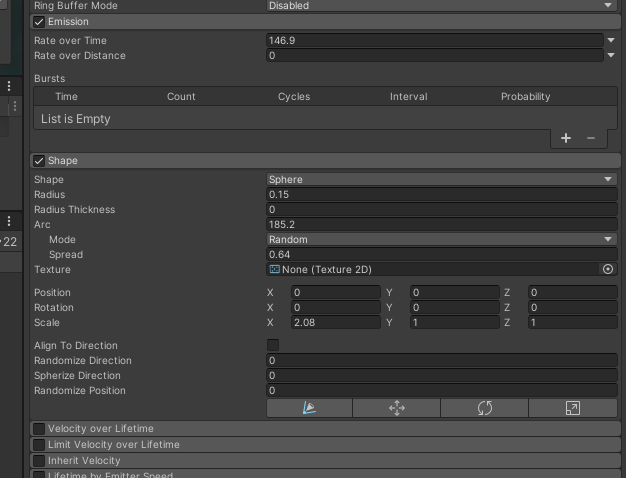
This is time for build our particle system. Particles System emmits each particle with some lifetime after which particle disapears. Rate and many others properties of particles can be set in particle system inspector.
First , we change material in rendering tab. We use material created in this tutorial.
All settings used in this tutorial can be viewed below:

Be careful. Stop particle system before You go to sleep If You don’t want to wakeup in flooded room ;)