Meet shaders (part 1) – Luna The shadow dust effect

Hi, Today I want to share a result of my first aproach to shader implementation. I have decided to look closeler to this feature after seeing LUNA – The Shadow Dust (lantern-studio.com). Visualy astonishong.
I wanted to make a reverse engineering some effect i have noticed waching this game.
I decided to use Universal Render Pieline. This Unity asset gives a posiibility to make shaders in very simple manner, using visual graph
Requirements
Unity 2020.2.2f1 or higher
In this version 2D renderers feature is not experimental anymore and shader properties are exposed for the animator which is very useful
Installation UPR
UPR works in Unity V2019 and above. To install UPR go to Unity, Window → Package Manager, and search Universal RP
Create a folder named URP or any other name you like, then create → Rendering → Universal Render Pipeline → Pipeline Asset (Forward Renderer)
Then In the Edit → Project Settings → Graphics, select the UniversalRenderPipelineAsset (UniversalRenderPipelineAsset) for Scriptable Render Pipeline Settings
In order to use 2d lights. create → Rendering → Universal Render Pipeline-> 2D Renderer and assign it to Universal Render Pipeline Asset created above
Creating first shader
Create->Shader->Universal Render Pipeline-> Sprite Lit Shader Graph
I have createt property Color(Input parameter of the shader accessible from a scene) for sand color. Honestly until shader is not finished it is better create input node insted property. You will be able to see results on preview.
I have created a property: texture. Analogicaly it is better to drag and drop some texture into the graph.
One more parameter Value (called “phase”). (Insted of one You can add slider to play with parameter an remove it after shader is ready)
All parameters have to be dragged and dropped to the graph.
I have connected color with “Base Color” on “Fragment” Node.
With texture wchich was actualy a mask i had to play a little bit. I show You the finall result of it
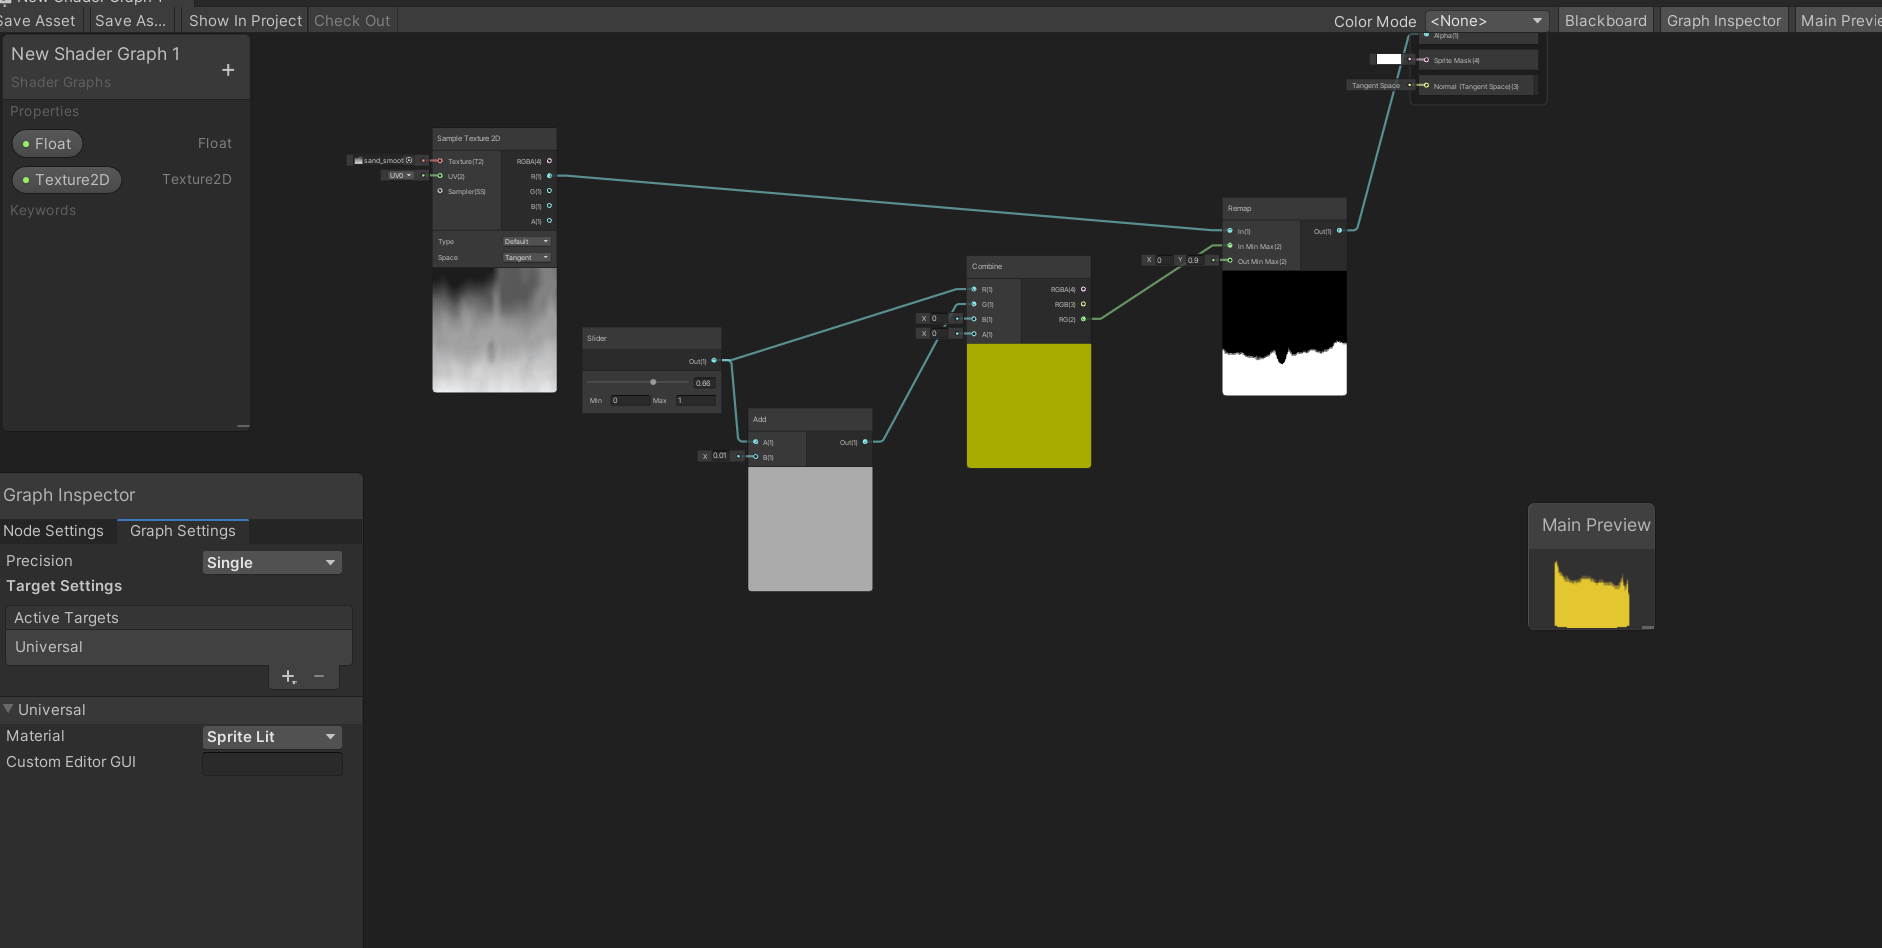
Slider (finaly “phase”) was conected twice: With R input of “Combine” node” and with “Add Node” (adding 0.01 value). Output of add withc was connected two “G” input of “Combine”. In this way i hav coded in RG two values (not colors) which can be input Min Max of Remap (requires two values input) Second Remap input was set to 0 and 1. Output of a Remap was connected two. Sprite Mask channel of “Fragmnt” node.\
Remap: Math->Range->Remap
Add : Math ->Basic
Combine: Channel
Click “Save Asset”
Create material and set this shader in shader property. Set texture like this:

Set a sand Color
Now You can apply this material to sprite (there will be warning that this material have no main texture but it will work anyway)
You can create sprite animation changing “phase” value of shader